Sunday, March 24, 2013

What's for dinner? Spinach lasagna


Spinach lasagna is one of my husbands absolute favorite meals, AND one of the few meals he really enjoys without meat involved. One thing he has always liked is creamed spinach and we all love pasta so one day out of pure boredom in the "usual" dinners we have I wanted to try something different and this is what came out. This was probably 2 years ago and he still asks for it rather often. Also took this to a church fellowship at our great little country church and despite my being hesitant to take it (not like spinach is a universal favorite food) my husband told me I should cause it was really good and it was ALL gone. Had many people comment on how much they liked it which made me feel awesome cause I get such enjoyment out of cooking for people and it is the icing on the cake when they really like it. And, this week my husband had a birthday so I was asked to make it again for him and I finally wrote it all down to get a recipe for it. Also, this is a favorite of my kids too, they love anything with cheese, noodles and mushrooms!

Here I'm going to give you a list of all the ingredients then I'll separate it out to the sauce, filler to make it easier when you are making it. It may seem like allot of ingredients but it is really easy to make, trust me, with two little ones I love me some easy meals.

This is for a 9x13 pan

Combined list of ingredients:
About 8-12 lasagna noodles broken to pan size
1 lg onion, largely diced
12 oz (approx 4c) mushrooms roughly chopped
1.5 tbsp + 1tsp garlic salt
2.5 tsp nutmeg
1.5 tsp chili powder
5-6tbsp olive oil
2tbsp minced garlic
2 10oz blocks frozen spinach (or about 5c fresh)
 2.5tbsp butter
2.5tbsp flour
3.5c milk
4tbsp Parmesan + extra for topping
1/2tbsp salt
6 1/4c mozzarella

Here are the ingredients separated out and the directions:
Boil Noodles to al-dente, set aside.
 
Sauce:
2.5 tbsp butter
2.5 tbsp flour
3.5c milk
4 tbsp Parmesan
1/2 tbsp salt
1 tsp garlic salt
1/2 tsp chili powder
1 tsp nutmeg
Melt butter in sauce pan until bubbly then add the flour whisking quickly keeping it on the heat. Once it starts to thicken (which will happen quickly) and turns a light brown color add the milk and quickly whisk so there are no lumps. Stir in salt, garlic salt, chili powder, nutmeg and cheese and continue to cook over medium high heat. Stir frequently. The sauce will act similar to gravy and will thicken while cooking until removed from heat so once it reaches a smooth consistency and the thickness of an Alfredo type sauce remove from heat.
 
 
Filler:
1 large onion, largely diced
12oz mushrooms (about 4c)
1.5tbsp garlic salt
1.5tsp nutmeg
1tsp chili powder
5tbsp olive oil
2tbsp minced garlic
2 10oz blocks frozen spinach thawed or about 5c fresh
In a large saucepan saute the onions and mushrooms with the olive oil until onions are translucent and mushrooms start shrinking and are tender. Add spinach, garlic salt, chili powder, nutmeg, minced garlic and cook together about 5-10 minutes. Stirring frequently. 


Now for the fun part, putting it together. :) 
This is the order of layering:
-2/3c sauce to cover bottom of 9x13 glass pan
-Noodles
-2/3c sauce
-1/2 of the filling
-2c mozzarella
-Noodles
-2/3c sauce 
-Second 1/2 of filling
-2c mozzarella
-Noodles
-Remainder sauce
-2c mozzarella
-Sprinkle Parmesan on top.
 
 Bake at 350 for 25 minutes or until lightly browned.
(If coming from the fridge like I suggest below, increase cook time about 15 minutes)


Now if you are anything like me, you like things that are easy to make ahead of time and throw in the oven when it is time for dinner. I've been blessed with 2 great nappers, both of my kiddos take about a 3 hour nap in the afternoon, and at the same time too, how awesome is that? It gives me great "chill" time for cleaning, cooking and prepping supper, reading, crochet, crafts, or whatever I decide I want to do. This is one of the meals I love because I can prep it and have it in the fridge ready to go in the oven when my husband gets off AND have the kitchen cleaned and dishes from cooking done for easy cleanup later.
 
 
Ta-DA! A clean kitchen with lasagna prepped!

You could make this a day or two ahead of time and have in the fridge, if you do I'd suggest increasing the cook time about 15 minutes to make sure it heats thoroughly.
  

ENJOY!

Tuesday, March 12, 2013

Learning & Teaching Colors. Toddler style!


Hi everyone, it's that time with my little girl. Time to introduce the actual learning stage, you know the lets sit and have "school time" stage. Toddlers have short attention spans, so, this list is a great hands-on list of activities to introduce colors. For the first 2 years you can show and explain and teach allot of things to toddlers, and even some "school time" type of activities but once they get a little older you can drive it in a little more. You can actually get them to keep attention on something for an amount of time, you can bring out the real fun! Learning colors is something easily made fun, and over the last couple weeks we have been doing allot of activities to show our little Annabelle colors and what an exciting couple weeks it has been! Remember to keep inserting the color names and explaining things to them. These are fun activities for parent and child, you can have fun watching them learn, and it's fine if the match up wrong colors every now and then too, you just work with them and show them differences and so on. Here is a list of some things that we used, keeping in mind that all activities listed require supervision, yes some less than others but these are meant to be things you do with them anyhow!

C-O-L-O-R-S!

12 GREAT Color learning/teaching activities for toddler: To teach and to simply introduce the colors to the little ones!

1: Baking, baking is ALWAYS a hit with toddlers
------Bake some simple sugar cookies from a mix or from a recipe and using some sprinkles (I used wilton crystal sprinkles). Do different color sprinkles on different cookies and talk about and introduce which colors are which. Also, when eating, they can pick out and tell you which color cookie they want to eat. 
Another great idea would be using a little food coloring to mix into the cookie dough to make colored cookie would be fun!


2: Colors by fruit
-----Using either colored cups or what I did is used colored tape on clear plastic cups seperate the fruit into matching cups. Just cut up the fruit and leave them with it! Helping them sort and get it right! Ideas...Grapes, Blueberries, Strawberries, oranges, banana, lime, lemon, clementine. Annabelle LOVES fruit so this is an awesome thing for her, and when it's done it makes an awesome and healthy snack time!

3: Colored rice
-----Color rice using a little vinegar and food coloring. About 1tbsp vinegar to each cup of rice. Mix the vinegar and food coloring keeping in mind that it will be a lighter than what the liquid is in the bowl or bag you mix it in. Once you mix the color and vinegar and then add in rice and coat well, lay out on foil lined baking sheet and let air dry. Time to dry varies by how wet it was and how thin you spread it on the sheet.  The rice can be used for pouring, playing in or making like a sand art project in bottles. This is a great addition to any hands on activity your little toddler likes to learn from.


4: Crayola color bath tablets!
 

 5: Sorting Blocks/balls
-----The kiddos love to play outside so we used chalk to draw big circles in different colors and brought out the baskets of the blocks and balls and let her go at it. Of course there is coaching going on but this is something you can let them do and they can learn from trial and error and you work with them. She had a blast with this and brother thought he was helping too.


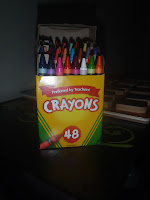
6: Basic Crayons
-----Crayons are fun, the kids feel in control, creative and proud to create their own artwork. You can also use this to help with shapes, draw some shapes and color an edge on it and let them match the color crayons with the color and fill it in. 
 

7: Markers
 

 8: Felt color matching
-----At walmart or any craft store you can buy a little jewelry findings storage box that you can use, and it also serves as a storage container for the felt pieces when you are thru. Alright this is simple, you need some felt in different colors, scissors, the box, glue gun! Cut a small piece of felt for the bottom of each little square and glue to the bottom. Using the rest of the felt cut out small shapes, triangle, square, rectangle etc. Lay out all shapes and let them match the colored shapes to each square. Also, I threw some little colored pompoms in the mix too. Another favorite for my Annabelle.


9: Fruit Loops and baking cups for sorting! AND of course, snacking!


 10: Color wheel and clothes pins matching game
-----What you need: Craft paint (8-9 colors), clothes pins (3 for each of the colors), large cardboard circle cut out (I just used an old diaper box we had I think). Using a marker or something to keep straight lines create the sections for each color and then paint each section with different color. Paint 3 clothes pins to each color. This is a great matching game, you can add in rewards or what we did, just did it for fun, getting it right and the excitement was reward enough for her. This is her absolute favorite color game and it doesn't take up too much space to store or take somewhere with you, would be fun for a car ride too!
 

11: Colored water
-----Kids love to shake, play in and do whatever with water most times. All you need is a bottle of water, we used mini ones and either food coloring or paint (I'd suggest keeping the bottle closed and for shaking activity only if you use paint). And I realize now I didn't get a picture of these finished when we did this so sorry but you can picture, it's fun for them to see the water change when the shake the bottle.


12: Colored tape
-----Like I used in a previous activity you can use it to distinguish the clear cups to each color or you could use in place of chalk in a sorting activity like in #5. This is a universal tool to play and craft with. Also, cream masking tape is great for a substitute to what colored tape you cannot find in store, just color with a marker.


Hands on learning is one of the best things for kids in my opinion, it makes it fun, exciting and interesting! This was such a fun blog to write, and to look back on this fun we have been having and continue to have. Truly, I believe that colors are one of the funnest activities to do with kids. This list is my compilation of activities, there are so many fun things to do but I hope this blog brings some fun, hands on learning for your kids! ENJOY! 

Thursday, March 7, 2013

What's for dinner? Spinach and parmesan stuffed chicken


What's for dinner? Spinach and Parmesan stuffed chicken breast.

My hubby LOVES spinach so we use it often, fresh, frozen, he'll eat it!

Ingredients:
3 large chicken breast butterflied and pounded
1/4c olive oil
1tbsp garlic salt
1/2c chopped fresh parsley
2tbsp minced garlic
1tbsp lemon juice
2 tsp lemon zest
1 1/2tbsp chili powder
1tsp nutmeg
1box frozen spinach (10oz) thawed and drained or about 2 cups fresh
1 5oz bag Parmesan cheese shredded
approx. 2 tbsp salt

Below is a picture of the marinade. Mix the Olive oil, garlic salt, parsley, minced garlic, lemon juice, zest, chili powder, nutmeg together. Marinade for a couple hours if you can if not just rub into chicken well in the beginning of the cooking process.
 

Below is chicken butterflied and to the side is where I was starting the marinade. 

  After you cover the chicken in the marinade, lay the chicken with the cut side up and spread a thin layer of the cheese then place the spinach on top. Evenly sprinkle the salt on top of the spinach then top with the rest of the cheese and fold over pushing as much in between the two sides of chicken as you can. This wont be perfect, and it doesn't have to be. Bake at 375 for 45minutes.
ENJOY! 

Monday, March 4, 2013

Healthy Cheese-it Crackers... with carrots!


 Healthy Cheese-it Crackers... with carrots!

Toddlers L-O-V-E cheese crackers. At least any I've ever known do. And lately, I've been trying to find healthy alternatives to the little snacks of the kids. No preservatives, who doesn't love that? Adding vegi's where they wont even know they are eating them, even better!

Ingredients:
1/2c shredded carrots
3/4c shredded sharp cheddar (you can substitute mild if you want)
1c All Purpose flour plus extra for kneading and flouring surface (substitute wheat or gluten free if you prefer)
4tbsp butter softened
3-4tbsp water
3/4tsp salt  (plus extra to salt dough before baking)

Mix shredded carrots, cheese, flour, salt and butter in a food processor or ninja. Pulse until little balls form. Add water 1tbsp at a time while pulsing until dough starts to form a ball. On a floured surface sprinkle dough with flour to keep it from being sticky and knead a few times. Place ball in the fridge for 20 minutes wrapped in plastic. Roll dough out to 1/4 inch thick, salt top of dough lightly using a pizza cutter cut crackers into squares or use a mini cookie cutter if you have one. Place on a foil lined baking sheet and bake at 375 for 8-16 minutes. The large span in baking time is because I baked mine around 8 minutes so they wouldn't be real crispy or crunchy because my son is a little younger and I feel more comfortable with them being softer. If you want them to be softer then stick with about 8-9 minutes, but if you want crispy crackers bake them about 12-16 minutes. Keep an eye on them though and the longer you bake them the darker the color will get. Mine puffed up a little too but they were GREAT and the kids absolutely love them.
All ours were different shapes and sizes cause miss Annabelle was having a blast helping!


Saturday, March 2, 2013

Crochet hello kitty pocket book for toddler


Crochet Hello Kitty pocket book for toddler.

This is not a pattern but an idea and tutorial to how I did it.

My Annabelle loves Hello Kitty ever since her daddy bought her a pillow for valentines day. She sees a Hello Kitty anything and gets excited.  

You will need:
Pink yarn 4ply
Black yarn 4ply 
White yarn 4ply
Sz. F crochet hook
and thing I always called a sewing needle but I know that's not right but it is a needle tip with an opening on back to loop yarn thru to help weave ends in. There is a picture of it later on. 

I will start by saying my grandmother taught me how to crochet when I was younger, I only wish I had taken more of an interest in it and pursued it the way I should have. Recently, I have taken back up with it and with the knowledge I still have from her wonderful teaching. Also, patterns are great but I tend to enjoy just trying to figure it out on my own and this is one thing that worked great.

First, I made the kitty, a white oval. Doing an oval is simple, you start with a chain, doing this and how long it needs to be depends on how big you want it. For this I did (leave a long tail) chain 5 turned and in the 2nd chain from your hook do a single crochet, continue that across, in the last chain, single crochet 3 and turn then single crochet in other side across, to the end, do 3 in end again, continue this around until you have completed enough rows to be the correct size. You can make ovals as big or little as you want but the chain in the beginning will depict how big it can get without starting to ruffle after so many rows. Once finished cut off leaving a long tail and pull thru last stitch. Then the ears, chain 5, turn and in 2nd from the hook do single crochet then in next chain, do a double crochet, then in the next chain I did what I'd like to call a triple crochet but I honestly don't know if it has a name (you yarn over twice before working into chain, then pull thru 2 at a time until all loops are gone). Make 2 of these and work into the top of the oval evenly from edges. The bow, with pink yarn chain 7, turn and in 2nd from hook single crochet across, turn & chain up 2, single crochet across again, finish off but don't tie in ends. Wrap black yarn around middle pulling it into a bow or do a short stretch of single crochet to tie it around. Work in black ends. Work pink ends into the bow while sewing into the ear on right side of the kitty. The nose/whiskers/eyes were weaved in with black yarn, No rhyme or reason just trying to evenly space and make the nose big enough. It will take some trial and error to get this how you want it probably(or maybe that was just me lol).


For the bag part I (leave a long tail) chained 85, turned and starting in 2nd chain from end did *single crochet in each chain across, turn (chain up 3) and do double crochet in each single crochet across*, turn (chain up 2) and do single crochet in each double crochet across. Repeat from *to* until bag reached height you prefer.Once you have reached the height you want finish off by cutting and pulling off a long tail thru the last stitch. Fold the completed work (with tails still loose) in half and using the long tails sew together the sides and bottom of bag. Weave in ends and finish off. 

 
You will notice the sides look rough, but, this will be the inside of the bag so it wont be seen.

Next, the straps, now I want to start by saying I wish I would have done these a little wider but never making a pocket book before I learned. It will work for now and if I need to I can strengthen them by working in more later. Anyhow, this is what I did, I chained 80, turned and in 3rd chain from hook double crochet in each chain across. Finish off. Make 2 of these. NOW, what I would suggest because if the one receiving this gift is anything like my Annabelle, they will want to put EVERYTHING in it, including the heaviest toy they can find. So, I suggest doing another row of double crochet and then a third row of only single crochet.

This is the needle I was referring to above.

Next, using the 2 tails you should have from the end of the strap sew in to the body of the bag about an inch from the end (the bag still needs to be inside out so you aren't making any work seen on the outside of the bag). Making sure the strap is straight line up the other end about an inch from the other end of bag (same side of the bag) and use a strand of yarn about 6 inches long to sew this end of the strap in. Repeat on the other side of the bag.


Then the fun part, the KITTY! Now, depending on what is easiest for you to work you may want to turn the bag right side out for this part so you can see where it is laying on the bag easier. That is what I did, I found it easier. Using the long tails you left loose on the kitty sew in to the bag centered the best you can. When I got to the bow part I just made sure to go in to the back of the stitches to work into the bag so that the white yarn wouldn't be seen in front.


Now, this is my first tutorial so I could have very easily left something out. Please comment and let me know what you think or if you have any questions. This was so fun to make and even more fun to finish to see her face and excitement when she got it (she just woke up from her nap so got to love the bed hair:). She takes it everywhere now.